When customers navigate to your landing page, chances are they’re not on the lookout for sleek design or catchy slogans. They’re probably not even that concerned about your brand itself. What they are looking for is value—can the products or services you offer potentially help them in some aspect of their life? The moment a customer clicks on your ad and ends up on your landing page is a key window of opportunity for you. They’re on the lookout to see if your brand is relevant to them, and you need to send the right messages to get them to stick around. If you’re lucky, they’ll even explore your website and eventually interact with it, whether via subscribing or shopping.
Staying relevant is key to optimizing your landing page to woo potential customers. Whether a visitor clicks away or stays on your site long enough to become a paying customer depends on how closely your landing page fits what each visitor is looking for. In this article, we’ll delve into how you can increase engagement from ad visitors via personalizing your landing page. In addition, we’ll go over the key parts of personalizing landing pages for ads and explain how to best automate this process.
Why personalize landing pages for ads?
Each ad visitor comes to your site with their own specific preferences and habits, all of which will impact what they hope to see on your site. Offering customized solutions will let each visitor know that you’ve taken the time and effort to cater to their attributes and interests.
Not only will personalized content make your audience feel seen and heard, it will likely boost customer conversion and engagement. Similarly, a personalized landing page generally receives a much higher ad score from Google than a generic page. Google awards these scores based on whether you are providing relevant content to your target audience, not based on whether you have a high domain authority or invested a high bid in your keyword.
Personalization starts with segmentation
Depending on the goals you have set for your business and your intended target audience, you will need to create relevant customer segments for your business before you start personalizing landing pages for ads. Website funnels, market research and analysis of your competition are all useful tools for getting an idea of who your ideal ad landing page visitor is. Once you’ve properly researched and segmented your audience, you can start to craft the perfect landing page for them. Here are some key criteria to consider:
Specific user types: Is your visitor a first timer, a returning lead or a loyal customer?
- Geolocational visitors: Are you targeting users from specific locations?
- Visitors from a specific source: Are you targeting users coming from a specific source, such as another website or social media platform?
- Specific UTM campaign: Are you looking to personalize your page specifically for customers targeted by a certain marketing campaign, such as using UTM parameters?
- Showing specific in-site activity: Is previous activity on your website an important criteria for your visitors?
- Visitors who show specific behavior on your landing page: Is on-site behavior, such as time spent on the page or trying to exit, an important factor?
- Past shopping behavior: Are you targeting existing customers who have bought a certain item from your website?
- Specific device: Are you targeting users visiting your site on a specific device, such as a tablet or mobile device?
Useful tips to personalize landing pages for ads
In order to get a better idea of good practices for personalizing your landing page for ads, we’re going to walk you through the process using a fictional product website. Our software of choice for segmentation personalization is Growmatik, a Cross-channel Marketing platform for WordPress & WooCommerce. This powerful tool combines user data collected from 3 touchpoints (website content, email and popups) with 50+ behavioral attributes to help you best connect to your target market across all 3 channels.
Not only does Growmatik offer a wide range of segmentation and targeting criteria, it also includes a fully visual editing interface to allow you to personalize your page without writing a single line of code.
Let’s get to it!
Welcome users with a personalized greeting and their intent
The first element a visitor will see when they reach your ad landing page—and one of the most important—is the text in the hero section of your page. In order to make a good first impression, you’ll want to craft a welcome message that is both personal and addresses your visitor’s search intent. For example:
It’s time to enjoy the best [ice cream] in town!
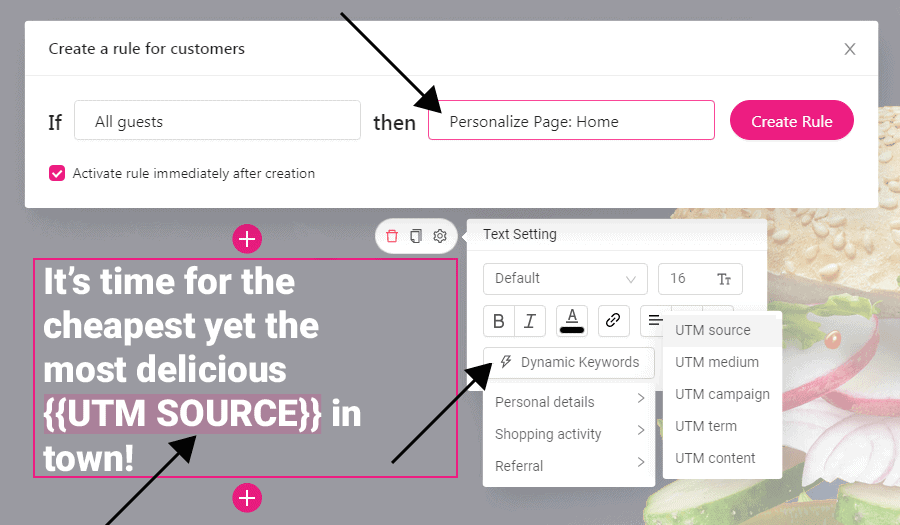
“Ice cream”, or whatever other search criteria brought the visitor to the site, is dynamically inserted by Growmatik according to the UTM parameters included in your ad link. To do this:
- Via the automation dashboard, click the + button in the Guests column.
- Set the condition as All Guests.
- Set the action as Personalize, and select your landing page from the menu.
- The Webpage Personalizer environment will appear. Once there, add a text element to the hero section, including a dynamic tag > utm source where applicable.
- Click Save & Exit and Create Rule.
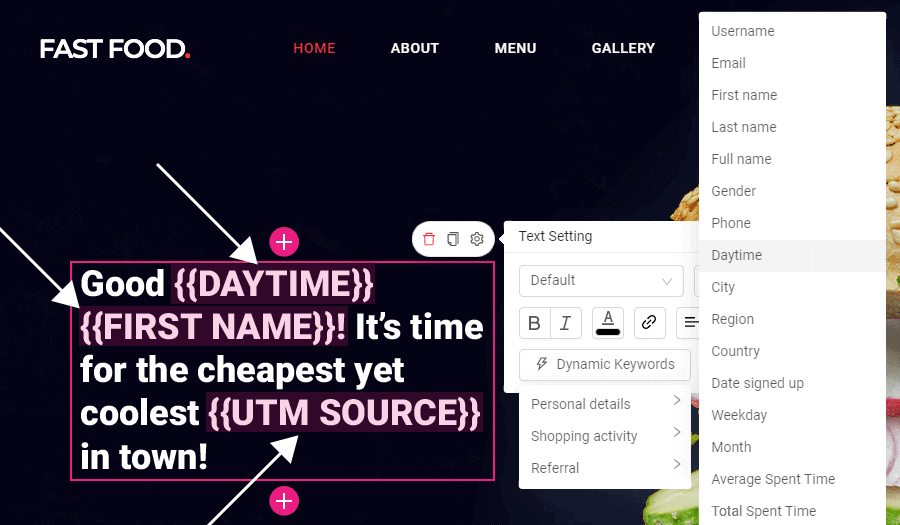
Including your visitor’s first name and time zone are other great ways to customize your intro text. This will only work for returning customers and any lead whose names you have. For example:
Good afternoon [Jono]! It’s time to enjoy the best [Pizza] in town!
The UTM parameters in your ad link allow the words “good afternoon,” “Emma” and “ice cream” to be dynamically inserted on the page. To achieve this with Growmatik:
- On the automation dashboard, find the Customers column and click the + button.
- Set the condition as All Customers.
- Set the action as Personalize and select your landing page from the menu.
- Once in the Webpage Personalizer environment, add a text element to the hero section, including a dynamic tag > utm source, first name and daytime where applicable.
- Click Save & Exit and Create Rule.
Show related images or videos in the landing page hero section
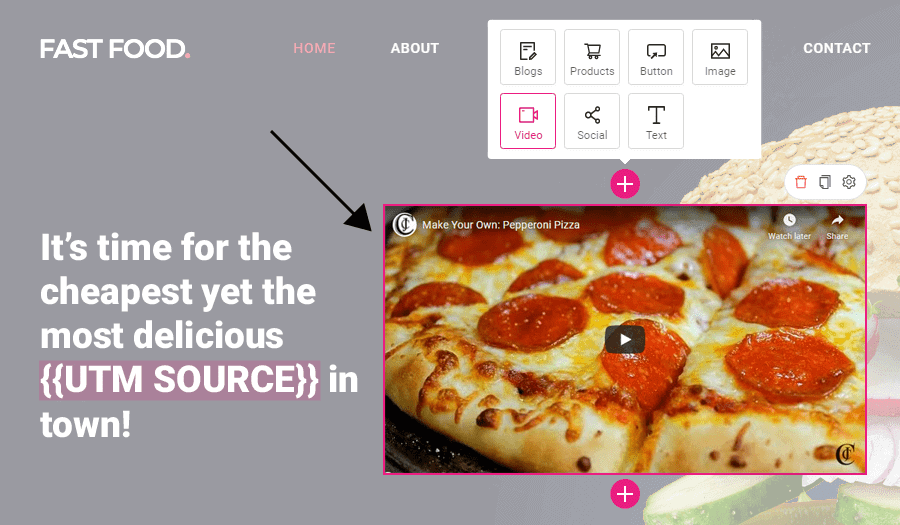
A generic promo video will just become a barrier for visitors, giving them extra incentive to click away. On the flip side, a promo video that matches your visitor’s intent will help them quickly learn more about the product or service they are looking for, shortening the time to conversion. To do this with Growmatik:
- Via the automation dashboard, find the Guests column and click the + button.
- Set the condition as All guests.
- Set the action as Personalize and select your landing page from the menu.
- Once in the Webpage Personalizer environment, add a video element to your hero section.
- Click Save & Exit and Create Rule.
- Repeat the process for the other two ads (UTMs), attaching a relevant video for each.
Show a personalized product list in your first section
Based on the ad your visitor clicked on, you can display a specific product or category of products. For returning leads or customers that left items in their shopping cart, encourage them to buy by first displaying the items in their cart and then displaying newer suggested items in another row. To do this with Growmatik:
- Via the automation dashboard, find the Guests column and click the + button.
- Set the condition as Source > utm_source=Jan2021PPC.
- Set the action as Personalize and select your landing page from the menu
- Once in the Webpage Personalizer environment, add a product element to the right section of your page, select content > category and choose the category related to the relevantUTM source.
- Click Save & Exit and Create Rule.
- Repeat the process for the other two ads (UTMs), selecting the relevant product categories for each.
Show personalized blog posts in landing pages
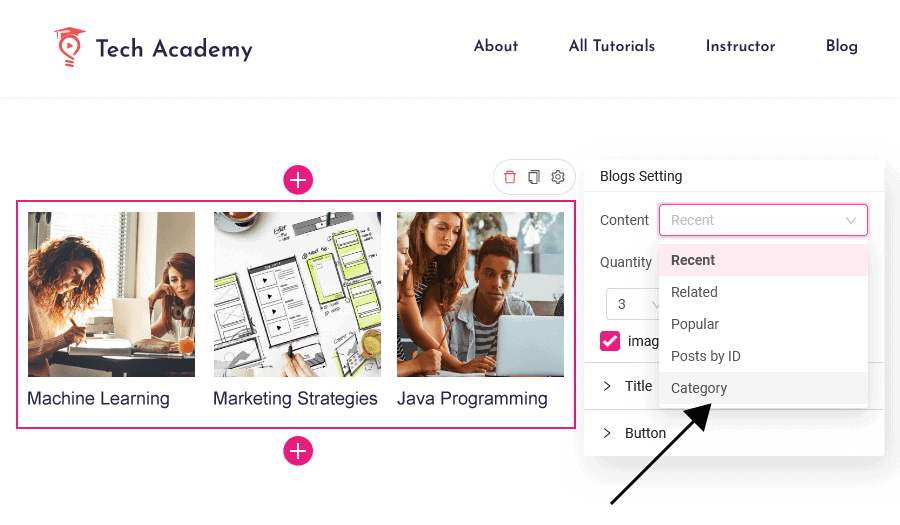
Blog posts are key in building customer awareness and converting customers that are on the fence. Driving traffic right to your landing pages with personalize blog post is great way to attract more reads. Your landing page can be a great place to share enlightening case studies or professional blog posts related to your market niche. For new visitors, display blog posts or categories that align with the ad that brought them to your site. For existing leads and return customers, provide posts related to their reading history. To do this in Growmatik:
- Via the automation dashboard, find the Guests column and click the + button.
- Set the condition as Source > utm_source=Jan2021PPC.
- Set the action as Personalize and select your landing page from the menu.
- Once in the Webpage Personalizer environment, add a blog element to the desired section of your page, choose content > category and select the category related to the respective UTM source.
- Click Save & Exit and Create Rule.
- Repeat the process for the other two ads (UTMs), selecting the relevant blog category for each.
Show popups exclusive for existing customers
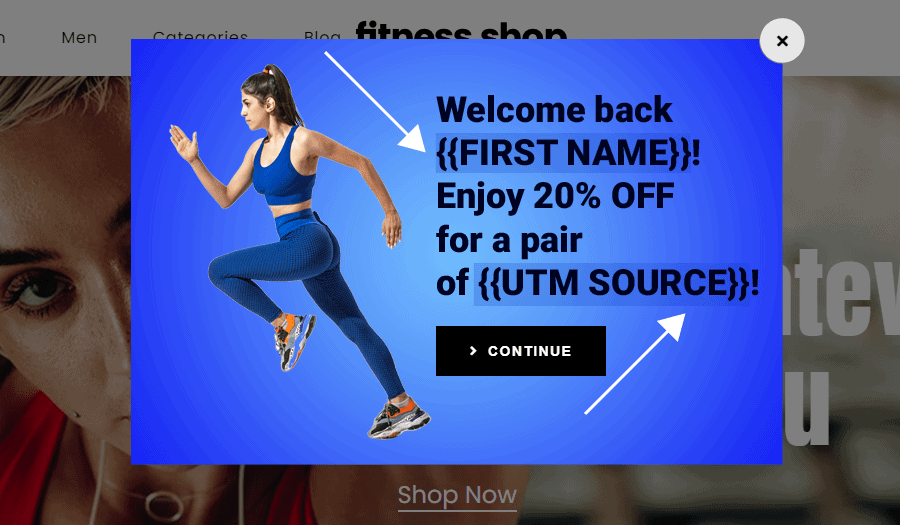
Treating existing customers to exclusive discounts and offers is a great way to maximize retention. If an ad brings an existing customer to your site, you can impress them with a personalized welcome and even an exclusive offer for the advertised product. To achieve this in Growmatik:
- Via the automation dashboard, find the Customers column and click the + button.
- Set the condition as Source > utm_source=Jan2021PPC.
- Set the action as Show Popup.
- Once in the popup builder tool, choose a premade popup template or create your own.
- Add a text element, making sure to include dynamic tags > first name and utm_source inside it.
- Click Save & Exit and Create Rule.
- Repeat the same process for the other two ads (UTMs) using relevant popup templates for each.
Personalize CTAs based on visitors’ location
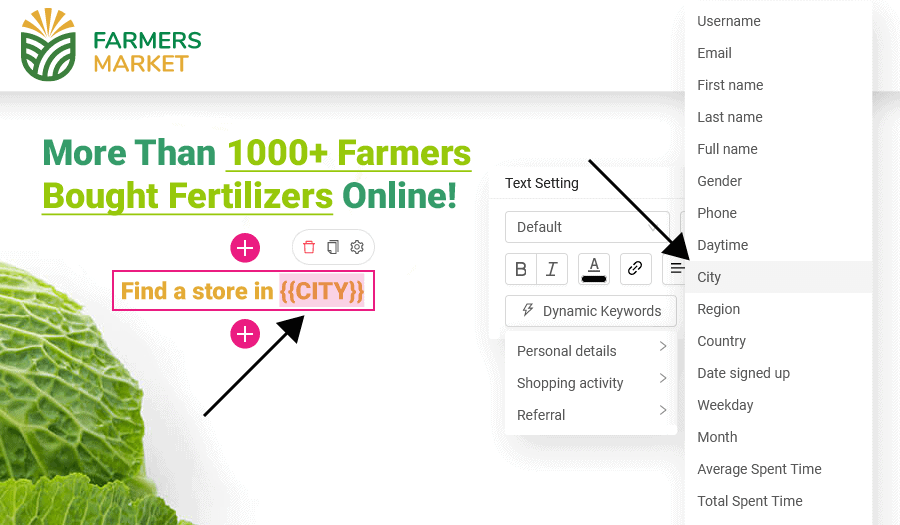
If you are targeting specific locations with your call to action, this can play into how you personalize your landing page for ads. Personalize the call-to-action depending upon each location, as seen below:
Find a store in Delhi
Find a store in Paris
Find a store in Cape Town
In Growmatik, we can use a dynamic keyword inside our call to action to achieve this:
- Via the automation dashboard, find the Guests column and click the + button.
- Set the condition as All Guests and the action as Personalize. Next, select your landing page from the page select menu.
- Once in the Webpage Personalizer tool, select the call-to-action button. Click the + button and add a text element.
- Click the setting icon. In the setting panel, click Dynamic Keywords > Personal Details > City.
- Click Save & Exit and Create Rule.
Include CTAs exclusive for mobile user
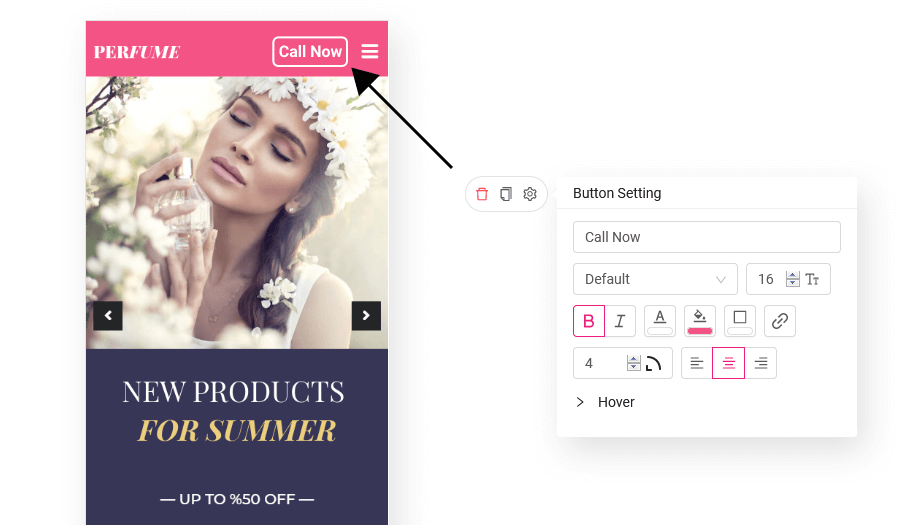
When deciding your ranking, Google indexes your mobile site before your desktop site, which means that crafting quality digital ads for mobile channels should be your priority. Placing mobile-exclusive items and controls on your ad landing page for mobile devices can help increase customer conversion. Some examples of mobile-exclusive controls include a “message on WhatsApp” or “call now” button.
To achieve this with Growmatik:
- Via the automation dashboard, find the Guests column and click the+ button.
- Set the condition as Device and select Mobile.
- Set the action as Personalize and select your landing page.
- Once in the Webpage Personalizer tool, add a Button to your top menu.
- Click Save & Exit and Create Rule.
Conclusion
Personalization can transform any marketing material from generic to eye-catching. Your visitors are more likely to feel recognized and catered to, which will ultimately increase their engagement and your chances of turning them into loyal customers. Identifying and studying your key target segments will guide you in the process of providing a personalized customer experience. To test new ideas, vet your new ads and landing pages with A/B testing to see how they compare with older materials.
